All posts in Auto Maintenance

Mileage Checkpoints for Auto Maintenance: How to Optimize Performance and Longevity of Your Vehicle

Mileage Checkpoints for Auto Maintenance

To keep your car running smoothly and efficiently, it’s important to pay attention to regular maintenance. The key is to be aware of certain mileage checkpoints for auto maintenance so you can make sure that all the parts are in good condition and functioning properly.

This will help ensure a longer lifespan for your vehicle as well as better performance overall. Let’s take a look at some of these mileage checkpoints that should be on your radar when it comes to auto sustainability.

3,000 to 5,000 miles

Change the oil and check all fluids

The first and most important is the oil change. It is essential to change your oil every 3000 to 5000 miles, depending on the type of oil and vehicle you have.

It’s highly recommended that this be done more frequently if you drive in stop-and-go traffic or often tow heavy loads.

Along with changing the oil, it is important to check your car’s other fluids, including the coolant. The fluid should be topped off periodically and replaced every two years or 24,000 miles.

5,000 to 8,000 miles

Rotate the tires.

Regularly rotating your tires helps keep them from wearing unevenly, which affects your vehicle’s performance and fuel economy. It can also help extend the life of your tires and reduce the risk of blowouts or flats due to excessive wear and tear.

15,000 to 30,000 miles (or yearly)

Change the engine air filter.

Changing the engine air filter every 15,000 to 30,000 miles (or yearly) is an essential part of auto maintenance as it helps to ensure that your vehicle’s engine is running efficiently and at peak performance.

The engine air filter removes harmful dirt, dust and other particles from the air before it enters the combustion chambers of your engine.

10,000 to 20,000 miles

Swap out the brake pads.

Swapping out the brake pads every 10,000 to 20,000 miles is an essential part of auto maintenance that should not be overlooked. Over time, the brake pads will become thin and worn out, which can affect the stopping power of your car.

Drivers need to replace them as necessary to maintain the highest levels of safety and performance. Doing so can help ensure that your car can stop quickly and efficiently, and also helps avoid more costly repairs down the line.

30,000 to 50,000 miles

Change the cabin air filter, fuel filter, and spark plugs.

Cabin air filters should be changed every 30,000 to 50,000 miles depending on the type of vehicle you have. This helps keep dust, pollen, and other allergens out of the cabin and improves air quality while driving.

To ensure optimal performance, fuel filters must be replaced at this mileage checkpoint as well. This will help keep contaminants out of your engine and help reduce the risk of damage.

50,000 to 60,000 miles

Inspect the timing belt, hoses, and suspension components.

It is important to inspect the timing belt, hoses, and suspension components every 50,000 to 60,000 miles to identify potential issues with these important components. Proper care of these parts can help maintain a smooth ride and avoid any sudden or unexpected breakdowns.

Additionally, the timing belt needs to be replaced regularly to prevent any damage to the pistons or valves.

60,000 to 100,000 miles

Change the transmission fluid, differential fluid, and power steering fluid.

Changing the transmission fluid, differential fluid and power steering fluid is an important part of auto maintenance. These fluids help to lubricate and cool components, optimize performance, and extend the life of your vehicle’s transmission system. It is recommended to change these fluids at least every 30,000 miles for optimal performance and fuel efficiency.

When changing the transmission and differential fluids, a certified technician should use the manufacturer’s recommended fluid as other fluids may conflict with your vehicle’s system. Additionally, you should also have the power steering fluid checked regularly for any signs of leakage or contamination.

100,000+ miles

Inspect the brake rotors and drums, and replace as needed.

Brake rotors and drums should be inspected every 100,000 miles or more. During the inspection, a mechanic will check for any signs of wear and tear such as grooves, thinning, or other damage to the surface.

If the rotors and drums appear to have been damaged beyond a certain point, they should be replaced to maintain optimal performance.

Annual Checkups

Lastly, you should take your car in for a general check-up every 6 months or 10,000 miles. This allows a certified mechanic to take a look at all the components and identify any potential issues before they become more serious or costly repairs.

By paying attention to these important auto mileage checkpoints, you can ensure that your car is running safely and efficiently and help extend its lifespan as well. It’s always better to be proactive rather than reactive when it comes to auto maintenance!

image credit: envato.com

The Crucial Benefits of Checking Tire Pressure Regularly: What You Need to Know

checking tire pressure

Having a flat tire is one of the most common and frustrating car problems. It can leave you stranded on the side of the road, waiting for help to arrive. But it doesn’t have to be this way!

By taking a few simple steps now, you can avoid costly repairs and roadside hassles in the future. One of these steps is checking your tire pressure regularly.

Keeping an eye on your tires’ air pressure helps ensure that they are inflated correctly, which will help prevent flats and blowouts, while also improving fuel efficiency and extending their lifespan.

In this blog post, we’ll discuss why it’s important to check your tire pressure and how to do it properly so that you don’t end up stuck with a flat!

What If Your Tire Pressure is Too Low or Too High

When tire pressure is too low, it can cause the tires to wear unevenly, which can have a negative impact on handling, cornering and braking performance. Additionally, when tire pressure is too low, it can cause the tires to overheat, which can lead to rapid tire wear and even a potential blowout.

On the other hand, when tire pressure is too high, it can cause decreased traction and an uncomfortable ride. In order to ensure that your tires are properly inflated, you should regularly check the air pressure according to the specifications listed in your vehicle’s owner’s manual.

Additionally, it is important to make sure that all four tires are properly inflated and have the same pressure level. In order to accurately measure tire pressure, a digital or analog tire gauge can be used.

Always remember that proper tire maintenance is essential for ensuring the best performance, safety and fuel economy for your vehicle.

How to Check Your Tire Pressure

To check your tire pressure, start by locating the tire pressure gauge. The tire pressure gauge is usually found near the air pump at most gas stations.

Once you have located the tire pressure gauge, remove the cap of one of your tires and place the nozzle of the gauge over the valve stem until it is securely in place. Then, press down on the button or lever on top of the gauge.

The pressure should be read in either PSI (pounds per square inch) or kPa (kilopascals). Compare your reading to the recommended tire pressure for your vehicle and add air as needed.

After you have taken a reading from all of your tires, replace the valve stem cap on every tire before returning the tire pressure gauge to its holder. Finally, make sure all of your tires are properly inflated to the recommended pressure level before continuing your journey.

What If You Experience a Blow-Out

If you experience a tire blow-out, it is important to remain calm and take immediate action. First, hold the steering wheel firmly and slowly apply the brakes until the car comes to a stop.

When possible, move your car off the road to avoid any danger to other motorists. If you are unable to move your vehicle, turn on your hazard lights and call for help.

If you have a spare tire, follow the instructions in your owner’s manual to replace it, or contact a mobile tire service for assistance. In any case, never drive on a flat or damaged tire—it can cause irreparable damage to your vehicle and put you in danger.

Regularly Inspect Your Tires

It is important to regularly inspect your vehicle for any signs of tire damage. Look for cuts, bulges, or worn treads on the tire’s surface. If you notice anything out of the ordinary, contact a professional mechanic for service and repair.

In addition, check your car’s tire pressure every month with a quality tire gauge. Properly inflated tires help with fuel efficiency and increase the life of your tire.

Overall, taking care of your car’s tires is not only important for safety, but also for increasing the lifespan of your vehicle. Developing a routine maintenance schedule that includes regular inspections and tire rotation will ensure that you won’t get stranded due to a flat or damaged tire.

Safe driving!

image credit: envato.com

Comprehensive Guide to Hail Storm Vehicle Repair

hail storm damage

If you are looking for a comprehensive guide to hail storm vehicle repair, you have come to the right place! In this article, you will discover tips on removing hail dents from your car, repairing paintless dents, and ensuring you get the maximum amount of money out of your insurance claim.

Paintless dent repair

If you’ve recently suffered hail damage to your vehicle, you’re probably wondering how to repair it. A few options are available, so take the time to make the best decision for your car.

You can bring your car to a hail storm vehicle repair Denver Co. It is a process that restores dents to their original shape without damaging the surface. A technician uses specialized tools and methods to manipulate patterns out of panels.

Another alternative is to have your vehicle repaired at a conventional body shop. Traditional repairs include replacing panels, filler, or glazing.

You’ll be given an estimate when you’ve filed your insurance claim. This estimate will include the costs to repair the hail damage. Typically, the forecast will be lower than the car’s actual value.

Hail can break your car’s paint. However, it doesn’t necessarily mean that you have to replace the entire panel. You can also get the color on the affected area sanded and clear coated.

DIY hail dent removal techniques

If you’re looking for tips on DIY hail dent removal techniques, you’ve come to the right place. You’ll learn to use tools you already have to remove the dents from your car. You can also find videos on YouTube that demonstrate how to do this.

Hail dents are a frustrating and unsightly blemish on your car’s appearance. They can vary from minor dings to significant structural damage. And while you can pop out most of the dents, some can be too large to remove.

Before you take the next step and start repairing your vehicle, it’s essential to do a thorough inspection. Even if the dents are not severe, they can still affect the paint. So, you’ll want to clean the patterns thoroughly with a cloth.

If the dents are too big to remove by hand, you may need to call a professional. Some insurance policies don’t cover hail damage repairs. Luckily, there are ways to get this work done for a lot less money than you would pay to have it done at a body shop.

Lienholders

If you have hail damage on your car, it is a good idea to take it to a reputable body shop to ensure that your vehicle is repaired correctly. However, hail damage claims are only sometimes quick and easy to process. It could take several weeks before you get your money.

The best time to file your claim is within 30 to 60 days of the storm. You should also note that some insurance companies will require proof of repairs before writing you a check.

The insurance company may write a two-party check in your name and your lienholder’s if you have an insurance policy. A lienholder is a bank or other institution that has loaned you money for your car and holds a legal claim until you pay off the loan.

When you first file your claim, you will ask if you need an estimate for the repairs. The appraisal can vary based on damage. An adjuster will inspect the vehicle and put together a rough estimate. Once you have an estimate, you should be able to schedule a repair date.

Getting an insurance claim done quickly

You should file an insurance claim quickly when your car has suffered from hail damage. If you wait, you could be facing thousands of dollars in damage.

The first step is documenting the damage and speaking to your insurance agent. Take pictures of the damage and the vehicle. Ask questions about your state laws. It is to help the company process your claim.

Once your vehicle has been inspected, an adjuster will give you an estimate of the repairs that need to be made. They will also note any conditions on your car that will affect the cost of repairs.

After getting an estimate, you will be asked when you want your repairs done. Your insurance company will work with a repair shop of your choice. You must pay a deductible before the company starts paying for the repairs.

image credit: envato.com

How to Clean Corroded Car Battery Terminals

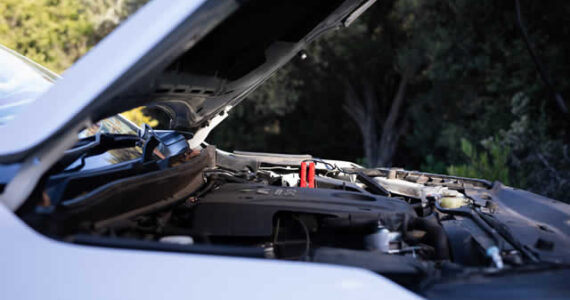
If your battery is starting to show signs of corrosion, it might be time to clean it. You can clean it using baking soda and water or purchase pre-bought cleaning sprays. The following instructions will help you clean it without causing any harm to your battery. Before you start cleaning, however, you should be aware of a few safety precautions. After all, your battery is one of the most expensive parts of your car, so you want to avoid any harm to your battery. Learn more about this in batteries winter garden FL.

Baking soda

You can use baking soda to clean the corrupted car battery terminal. This simple solution will neutralize the acidic nature of corrosion. The answer is effective in cleaning both the battery and the clamps. You can make a paste out of baking soda by pouring a little water into a small dish and then gently scrubbing the affected area. You can also use steel wool to scrub off corrosion. Then, apply petroleum jelly to the terminals and clamps to prevent future decay.

After cleaning the battery terminals, you can use distilled water to rinse them. After you rinse, you can use a lint-free cloth to pat dry the terminals. Finally, you can apply petroleum jelly or grease to protect the airports. Then, reconnect the battery cables and enjoy your new car again! You don’t have to buy expensive equipment to clean car battery terminals.

Water

Baking soda or vinegar can clean corroded car battery terminal corrosion. The baking soda and vinegar mixture is a proven way to clean the terminals without damaging them. First, apply it to the battery terminals and scrub them. Then, rinse the terminals with clean water. You can also use petroleum jelly to protect the terminals from further corrosion. Once you’re finished cleaning the battery terminals, you can connect them to your car battery.

To start cleaning corroded car battery terminals, you must ensure that the posts are entirely removed. After cleaning the airports, you can apply a small amount of battery terminal cleaner. You can also wipe down the positions of the battery with a clean rag. Then, you can reconnect the battery terminals with the junction covers. Once this is done, you can install the battery back into your car.

Pre-bought sprays

If you’ve noticed corrosion or other signs of deterioration in the terminals of your car battery, you should take steps to remove it before further damage occurs. You can clean with a pre-bought spray or make your own solution from baking soda and water. Ensure that you’re wearing protective gloves during the process and use a wire brush to scrub the terminals. You can also apply an anti-corrosion gel or battery terminal protector to prevent further corrosion.

Before applying any cleaning solution, you should always apply a corrosion inhibitor. This protectant is very effective against future corrosion problems. You can use a store-bought spray or petroleum jelly. For best results, use an oil-based corrosion inhibitor such as Noco’s NCP2.

Cleaning with baking soda

You can mix baking soda and water to clean corroded car battery terminals. The soda will react with the corrosion and neutralize it. Once mixed with water, scrub the terminals with a brush. Be careful not to get the baking soda on your hands or the battery. To avoid contamination, wear protective gloves. You can also use a wire brush or an old stiff-bristled toothbrush to scrub the terminals. It would be best if you also used an old rag that you do not mind getting dirty.

If cleaning the battery terminals yourself, remember to wear protective gear, such as a respirator and thick rubber gloves. Use a wire brush to scrape off the corrosion. After cleaning the terminals, you should remove the cables. If the pollution is causing the battery to leak acid, remove it using a wire brush. If the corrosion isn’t too bad, use a solution of baking soda and water. You can use this solution in place of a battery cleaning solution.

Cleaning with vinegar

Cleaning corroded car battery terminals can be difficult, but you can save yourself a lot of frustration by using a simple solution. All you need is a solution of vinegar, baking soda, and some elbow grease. To begin, unplug the battery. Next, you can use pliers to remove any clamps. Then, use a wire brush to scrub away the residue.

To begin, disengage the negative battery cable from the positive terminal. Then, add a little baking soda to the solution and scrub. For stubborn corrosion, a wire brush will be necessary. You can also try cleaning the terminals with Permatex Battery Cleaner. It comes with instructions and is also a very effective cleaning solution. However, check the battery to ensure that nothing is damaged.

image credit: envato.com

Anatomy Of A Detailed Car

When most people talk about cleaning their cars, they’re referring to the exterior. This is an important part of regular maintenance, but it’s a lot like only getting your hair wet and calling it a shower. Using soap and water on the outside of your vehicle or taking it through the automatic car wash addresses just part of the problem.

Dirt, dust, grease and grime can get everywhere. If left alone, debris can do serious damage to the vehicle’s look and performance. This is why it pays to have your vehicle detailed by professionals on a regular basis. These experienced technicians know all of the key car cleaning steps to ensure the best overall results and the most comprehensive clean.

For example, countless DIY washes overlook areas such as the doorjambs. This can be harmful to the car because the rubber seals inside them can age prematurely unless they are kept clean. Pros also know that the undercarriage can be the dirtiest area of any vehicle. Accordingly, they will wash it thoroughly with high-pressure hoses and the right amount of solvent to break up stubborn gunk.

To envision what a truly clean car looks like, read the accompanying infographic. It breaks down crucial elements of a professional car wash.

Author Bio: Jeff Carey is Vice President of Sales at CleanTouch, a leading car wash chemical brand serving thousands of car washes across the United States and Canada. He has 20 years of experience in the industry — and focuses on P&L, sales management, and field execution of the company’s strategies and plans.

detailed auto