Staring at a car that’s seen better days—dull paint, cloudy windows, a cabin full of crumbs and mystery stains—can feel discouraging, especially when you’re not sure where to begin.
The good news is that a single weekend and the right approach can transform your vehicle from neglected to showroom-ready, without the professional price tag. This guide walks you through every stage of DIY auto detailing, from gathering supplies to the final polish, so you can achieve lasting, professional-level results at home.
Auto detailing isn’t just a deep clean. It’s a methodical process that protects your investment, preserves resale value, and restores the pride you feel every time you slide behind the wheel.
According to Ride and Shine Detail (2026), a thorough exterior detail typically involves washing, decontaminating, polishing, and protecting the paint, and most owners benefit from doing this two to four times a year.
Tackling it yourself can also save real money. NHSA (2026) notes that DIY detailing can save over $200 per visit compared to a commercial service. With some patience and the right tools, that savings doesn’t have to come at the cost of quality.
Gather Your Supplies and Tools
Every successful detailing session starts with preparation. You’ll want wash mitts made from plush microfiber or lambswool, several microfiber drying and buffing towels, a clay bar with accompanying lubricant, a quality polish and compound, and a wax or sealant for protection.
A pH-neutral car soap is essential, since household dish soap can strip away existing wax or sealant layers, leaving your paint exposed. For wheels, choose a pH-neutral wheel cleaner rather than an acid-based formula, which can damage polished or coated finishes.
Investing in these quality tools upfront pays off, both in the results you achieve and in the long-term health of your vehicle’s paint. A full setup typically runs between $200 and $600, an investment that often pays for itself within the first year if you detail your car regularly.
Prepare Your Vehicle and Work Area
Before you touch a sponge to your car, set the stage for success. Choose a shaded spot away from direct sunlight, since heat causes soap and water to evaporate too quickly, leaving behind spots and streaks. Ride and Shine Detail (2026) recommends working in temperatures between roughly 55 and 85 degrees Fahrenheit and avoiding windy conditions, both of which help products perform as intended.
Once you’ve found your spot, give the entire vehicle a thorough pre-rinse to remove loose dirt, paying close attention to wheel wells, lower doors, the front bumper, and the rear trunk area, where grime tends to accumulate most heavily. This initial rinse prevents you from grinding dirt into the paint once the detailed wash begins.
Master the Two-Bucket Wash Method
The two-bucket method is the gold standard for a scratch-free wash, and it’s simpler than it sounds. Fill one bucket with soapy water and the other with clean rinse water, ideally with grit guards at the bottom of each to trap debris before it reaches your mitt.
Start with the wheels and tires first, since they’re typically the dirtiest part of the car, and you don’t want brake dust splashing onto freshly cleaned paint. Once the wheels are done, move to the body, working from top to bottom: roof, windows, hood, sides, and finally the lower panels and bumpers, which hold the most road grime.
After washing each panel, rinse your mitt thoroughly in the clean bucket before reloading it with soap. This simple habit keeps grit from being dragged across your paint, which is one of the most common causes of fine swirl marks.
Dry the car immediately afterward using a plush microfiber towel, patting and blotting rather than dragging, to avoid new scratches and water spots.
Clay Bar Treatment For A Smooth Finish
Even a careful wash can’t remove everything. Bonded contaminants like tree sap, road tar, and industrial fallout sit on top of your paint and resist ordinary washing. This is where a clay bar comes in.
Spray a dedicated clay lubricant onto a small section of the panel, then glide the clay bar gently back and forth, letting it lift embedded particles without forcing contact. Work in manageable sections, folding the clay as it picks up debris to expose a clean surface.
Once you run your hand over the paint, you should notice an immediately smoother, glass-like texture, a sign that your surface is now properly prepped for polishing.
Polish And Compound Application
Polishing restores clarity and addresses minor imperfections that washing and clay treatment can’t fix. Before you begin, inspect your paint under direct light or a dedicated detailing light to identify where correction is actually needed.
A dual-action, or DA, polisher is the most forgiving option for beginners, since its random-orbital motion significantly reduces the risk of burning through the paint, a risk that comes with more aggressive rotary polishers.
Start with the least aggressive option, a finishing polish on a soft pad, and only move up to a cutting compound on a firmer pad if deeper correction is genuinely needed. Apply your chosen product in slow, overlapping circular motions, letting the pad and product do the work rather than pressing down hard.
Swirl marks are most often the result of improper washing technique, so this stage also reinforces why the two-bucket method matters so much.
Protect Your Work With Wax Or Sealant
All that effort deserves lasting protection. Traditional carnauba wax delivers a warm, deep gloss but typically lasts only one to three months before it needs reapplication.
Synthetic paint sealants offer a more durable alternative, often lasting six to twelve months, making them a practical choice for owners who want longer-lasting results with less frequent upkeep.
For maximum durability, ceramic coatings can last anywhere from one to five years or more, though professional application is generally recommended given the preparation and precision involved.
Whichever option you choose, apply it before new contamination has a chance to settle, and follow the manufacturer’s recommended cure time for the best results.
Interior Detailing Essentials
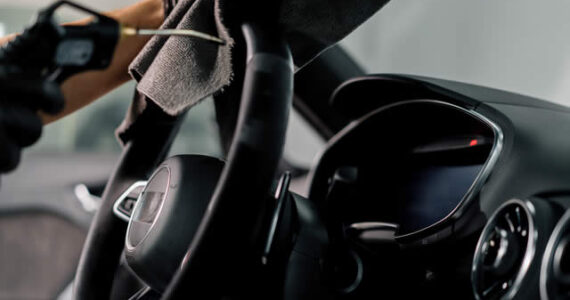
A spotless exterior deserves an equally refreshed cabin. Begin by vacuuming thoroughly, working from the top of the cabin downward and paying close attention to under-seat areas, crevices, and door pockets where dust and crumbs like to hide.
Different surfaces call for different care: use a cleaner formulated specifically for leather on seats, a gentle all-purpose cleaner for plastic trim and dashboards, and an appropriate fabric cleaner for cloth upholstery and carpets.
Always test any new product in a hidden spot first to confirm it won’t discolor or damage the material, and avoid over-wetting fabric surfaces, since excess moisture can lead to lingering odors or mildew. Finishing with a leather conditioner, where applicable, helps prevent cracking and keeps seats supple over time.
Final Touches And Maintenance Tips
With the major work done, it’s time for the finishing details that make all the difference. Apply a water-based tire shine for a clean, non-greasy look, since water-based formulas tend to hold up better than solvent-based alternatives over time.
Clean your glass with an ammonia-free cleaner, which is safe for tinted windows, applying the product to a cloth rather than spraying it directly onto the glass to avoid overspray on your freshly detailed interior.
If your plastic trim has faded, a trim restorer can bring back its original richness, just be sure to wipe away any excess before it dries onto nearby paint. Between full detailing sessions, a quick detailer spray and a gentle pH-neutral wash will keep your results looking fresh without stripping away your wax or sealant.
Your Weekend Investment Pays Off
Detailing your own car is a skill that rewards patience and attention to detail, quite literally. By following each stage in order, from the two-bucket wash through clay treatment, polishing, and protection, you give your vehicle the same careful process a professional would use, at a fraction of the cost.
The time you invest this weekend will show up in a deeper shine, a smoother finish, and a cabin that feels genuinely refreshed every time you get in. Keep up with light maintenance between full details, and your car will continue looking its best for months to come.
- Kasparian, Jack. "The Complete Guide to Exterior Car Detailing (2026)." Ride and Shine Detail, July 14, 2026. https://rideshinedetail.com/the-complete-guide-to-exterior-car-detailing/
- NHSA. "DIY Exterior Car Detailing: Step-by-Step Guide." March 31, 2026. https://nhsa.com/en/diy-exterior-car-detailing-step-by-step-guide
image credit: envato.com


