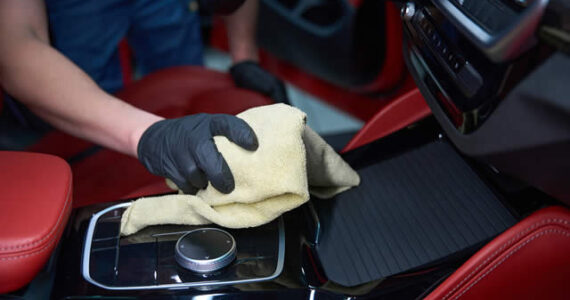
You remember the moment clearly—sliding into a fresh-from-the-lot seat, breathing in that clean, crisp scent that made everything feel possible. Years of commutes, road trips, coffee spills, and muddy shoes have a way of quietly eroding that experience.
The good news? That new car feeling is not gone forever. With the right approach to car detailing, deep cleaning, and odor elimination, your used car can feel—and smell—like new again.
Start With the Interior Cabin
The interior is where you spend most of your time, so it demands the most attention. Begin by removing every item from the car—floor mats, seat pocket contents, reusable bags, and anything else that has quietly accumulated.
Once empty, use a high-powered car vacuum with crevice and brush attachments to reach under seats, between cushions, and along door panels. This first pass removes the loose debris that traps odors and dulls the overall environment.
Do not rush this step. A thorough vacuum is the foundation of every successful car detailing job. Skipping it means you will be working around dirt rather than eliminating it.
Restore Upholstery and Carpets
Fabric seats and carpets absorb spills, sweat, and odors over time. A quality automotive upholstery cleaner—applied generously, agitated with a stiff-bristle brush, and extracted with a wet/dry vacuum—will lift embedded grime and revive the texture of your interior surfaces. Repeat the process on stubborn spots until the carpet fibers regain their original tone.
For leather seats, the approach is different. Use a pH-balanced leather cleaner to remove surface dirt, then follow with a leather conditioner.
Conditioning is essential—without it, leather dries out and cracks, which ages the interior rapidly. A well-conditioned leather seat looks noticeably newer and holds up far longer against daily wear.
Eliminate Odors at the Source
Masking a bad smell with air freshener is a temporary solution that wears off within days. True odor elimination requires identifying and removing the source first.
Check under the seats for forgotten food wrappers, damp floor mats, or pet-related debris. Once the source is gone, apply an automotive odor eliminator—these products use enzyme-based or oxidizing chemistry to neutralize odor molecules rather than simply covering them.
For deeply embedded smells—smoke, mildew, or long-standing pet odor—an ozone generator treatment is one of the most effective options available. This process should be performed by a professional detailer or carried out with strict adherence to safety protocols, as ozone is harmful to breathe in concentrated amounts.
Refresh the Ventilation System
One commonly overlooked contributor to stale cabin air is the ventilation system itself. The cabin air filter, which prevents dust and allergens from entering through the HVAC system, should be replaced every 12,000 to 15,000 miles—or sooner if you notice a musty smell when the air conditioning runs.
According to the Car Care Council, a clogged cabin air filter can reduce HVAC efficiency and noticeably degrade air quality inside the vehicle.
After replacing the filter, spray an automotive AC vent cleaner into the intake vents with the system running on recirculation mode. This sanitizes the evaporator core and duct work, eliminating bacteria and mold that collect in the dark, damp environment of the ventilation system.
Wash the Exterior the Right Way
A clean exterior is not just about appearance—it signals that the vehicle has been cared for, which changes how you feel about driving it. Avoid single-bucket washes, which drag dirt across the paint and cause fine scratches.
Instead, use the two-bucket method: one bucket for soapy water made with a dedicated car shampoo, and one for rinsing your wash mitt. Wash from the roof down to the lower panels, rinsing frequently to avoid reapplying contamination to clean surfaces.
Dry with a soft microfiber towel or a forced-air blower to prevent water spots, which are particularly visible on dark-colored paint.
Decontaminate the Paint Surface
Washing removes surface dirt, but it does not remove embedded contaminants like industrial fallout, rail dust, or tree sap residue. These microscopic particles bond to the clear coat and create a rough texture that dulls the paint’s reflective quality.
Running a clean hand across a freshly washed hood will reveal them—if it feels gritty rather than smooth, clay bar decontamination is the right next step.
A detailing clay bar, used with a clay lubricant spray, safely lifts these contaminants without scratching the surface. The difference in paint texture before and after is immediately noticeable.
Polish Away the Years
Minor swirl marks, light scratches, and oxidation are the visual evidence of years of use. A dual-action machine polisher with a cutting compound removes a thin layer of clear coat to eliminate these imperfections, while a finishing polish restores clarity and gloss.
Hand polishing is an option for small areas, but a machine polisher produces more consistent results across large panels.
This step, more than any other exterior treatment, restores the depth and reflectivity that makes paint look new.
Protect What You Have Restored
After polishing, the paint is clean and corrected—but unprotected. Applying a car wax, paint sealant, or ceramic coating locks in the results and creates a hydrophobic barrier that repels water, road grime, and UV damage.
Waxes provide a warm gloss and are easy to apply but require reapplication every few months. Synthetic sealants last longer—typically six to twelve months. Ceramic coatings offer the most durable protection, often lasting two or more years, though professional application is recommended for best results.
Don’t Overlook the Details
Trim, glass, wheels, and tires each play a role in the overall impression your car makes. A dedicated plastic and rubber trim restorer prevents dashboard components from fading or cracking.
Glass cleaner applied to the interior windshield eliminates the film that builds up from outgassing vinyl and reduces nighttime glare. Wheel cleaner and tire dressing applied to the exterior finish the job—clean, dressed tires frame the vehicle and complete the polished look.
Bringing It All Together
Restoring a used car to that new car feeling is not a single product fix—it is the result of methodical, layered care applied to every surface inside and out. Deep cleaning removes the source of odors. Upholstery treatment revives your most-used surfaces.
Paint decontamination, polishing, and protection return the exterior to its original brilliance. And when every element is addressed together, the transformation is striking.
Your car has not aged beyond saving. It has simply been waiting for the right attention. Set aside a weekend, work through these steps systematically, and you will find that the vehicle you drive every day can feel like something you just picked up from the lot.
Frequently Asked Questions
How do I get the new car smell back?
The new car smell comes from off-gassing of new materials, which fades permanently over time. The closest substitute is thorough odor elimination—removing odor sources, using enzyme-based neutralizers, refreshing the cabin air filter, and sanitizing the ventilation system. Some detailers also use new car scent sprays as a finishing touch after deep cleaning.
How often should I deep clean my car’s interior?
A thorough interior detail—including vacuuming, upholstery cleaning, and odor treatment—is recommended every three to six months for average use. High-use vehicles or those exposed to pets, food, or heavy traffic may benefit from more frequent cleaning.
Is a clay bar treatment safe for all paint finishes?
Yes, when used correctly with an adequate clay lubricant, a clay bar is safe for all modern automotive paint finishes, including clear coat, matte, and wrapped surfaces. Avoid using clay dry, as this can cause scratching.
What is the difference between car wax and a paint sealant?
Car wax is typically made from carnauba or synthetic compounds and provides a warm, natural-looking gloss. Paint sealants are polymer-based and offer longer-lasting protection—often six to twelve months versus six to eight weeks for wax. Both serve the same protective function; the choice depends on how long you want the protection to last.
Can I do all of this myself, or do I need a professional detailer?
Most of these steps—vacuuming, shampooing, clay bar, hand waxing—are well within reach for a motivated DIYer with the right supplies. Machine polishing and ozone treatment involve a steeper learning curve and carry a small risk of damage if done incorrectly. For those two steps specifically, professional detailing is a worthwhile investment.
- Car Care Council. (2024). Car Care Guide: Keeping Your Vehicle in Top Condition. https://www.carcare.org
- Meguiar’s. (2024). The Complete Guide to Car Detailing. https://www.meguiars.com/learn/complete-detailing-guide
- Chemical Guys. (2024). How to Use a Clay Bar on Your Car. https://www.chemicalguys.com/blogs/how-to/clay-bar
- Consumer Reports. (2024). How to Keep Your Car Clean and Fresh. https://www.consumerreports.org/cars/car-maintenance/how-to-keep-your-car-clean
- International Detailing Association. (2024). Professional Detailing Standards and Best Practices. https://www.the-ida.com
image credit: envato.com


 Gracie Hayden: Exactly, If we maintained our vehicle regularly, It will work properly...
 nathaliebieleu: This is one to get roadworthy and just drive and enjoy...
 James King: What if someone suffer from bad credit history?...
 Dorothy Catlett: I think, Parents should teach their kids by purchase a car with LOAN t...


